Crossy Road Game
To make a Crossy Road-style game, we’ll need a background, three sprites that move back and forth, and a sprite that can move in every direction.
We’ll also need to tell the computer that if the sprite touches a car, the game should end.
Background
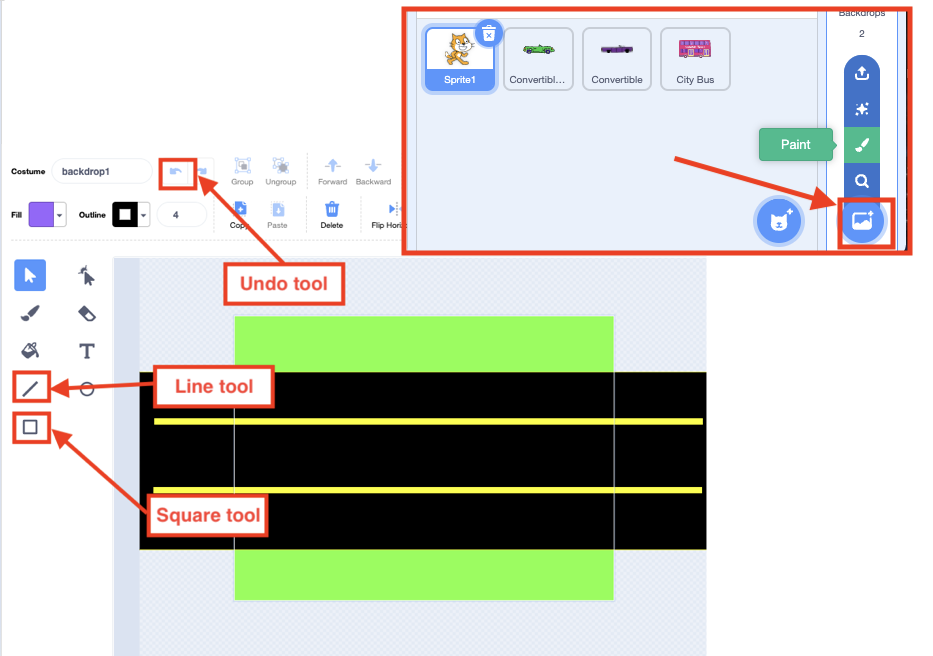
Draw your own background by hovering over the little blue circle in the lower right hand corner of Scratch, and clicking the paintbrush!
The fill bucket doesn’t work so well- use a green square instead for the grass.
Then, place a black square over the green grass for the road.
Finally, use the line tool for road lines!
If you make a mistake, use the UNDO button.
Car sprites
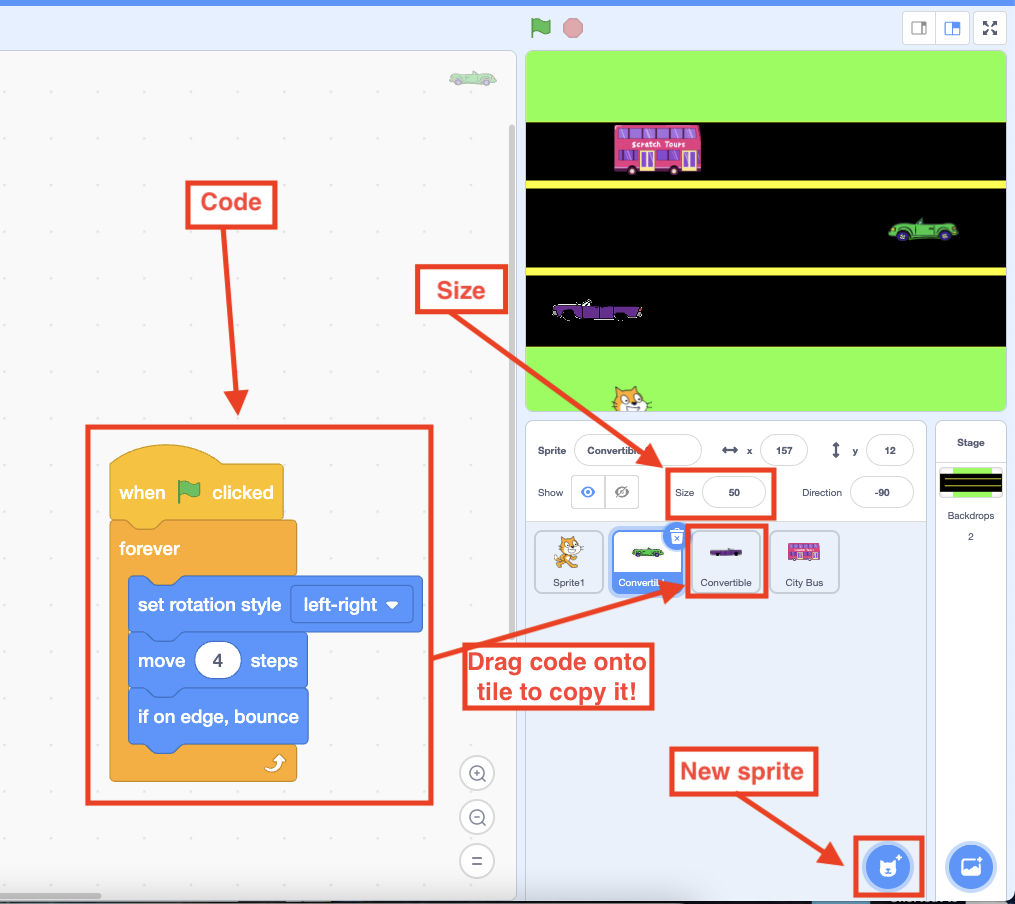
Click the circle blue button in the lower right hand corner that has a picture of a cat and a plus sign, and search for a picture of a car.
Afterwards, click and drag the car in the action window where you want. (If it’s too big, change the size property right underneath the action window! 100 is regular size, 50 is half size.)
Finally, we’ll need some code. Get your when green flag clicked block and a forever block, then add a move 10 steps block, an if on edge, bounce block, and a set rotation style left-right block.
Hint: copy code between sprites by clicking on the code blocks and dragging them over the sprite tiles on the right hand side of the screen!
Double hint: if your car is moving too fast, change the 10 in the move 10 steps block to a smaller number!
Player sprite
In order to move every direction, your sprite will need to be set up in the right spot.
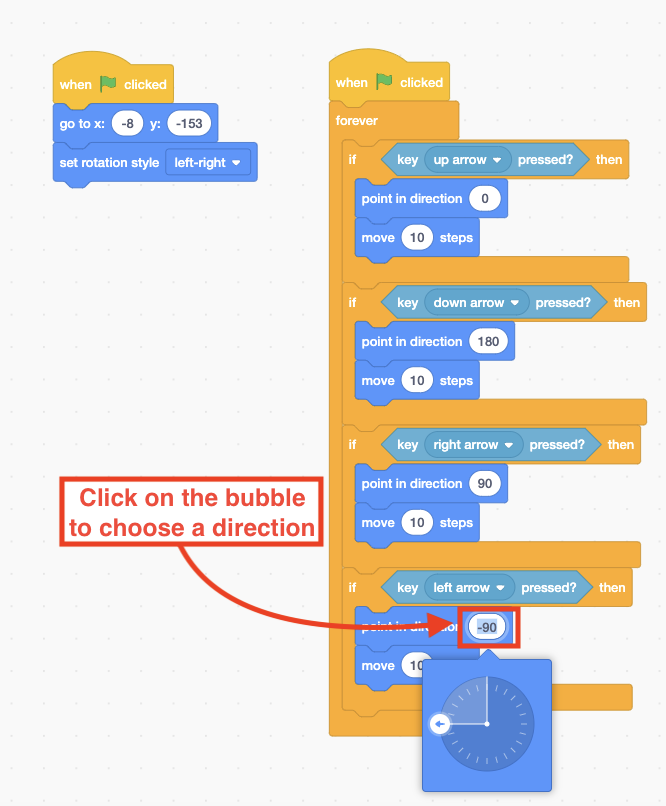
First, grab a when green flag clicked block. Then, click and drag your sprite to where you’d like it to start (this will change the coordinates in the motion blocks). Finally, grab a go to… block and a set rotation style left-right block. Run it a couple times to make sure your sprite starts where you want it to.
To make your sprite move, you’ll need a different when green flag clicked block and a forever block. Inside the forever block, you’ll need four if blocks (from the control section of the toolbox), one right after the other.
Inside the diamond space of each if block, put a key pressed block from the sensing section of the toolbox- one for up, down, left, and right keys.
Finally, inside the arms of each if block, grab a point in direction block and a move 10 steps block. Click on the point in direction block to choose which way your sprite should face.
Lose if touching car
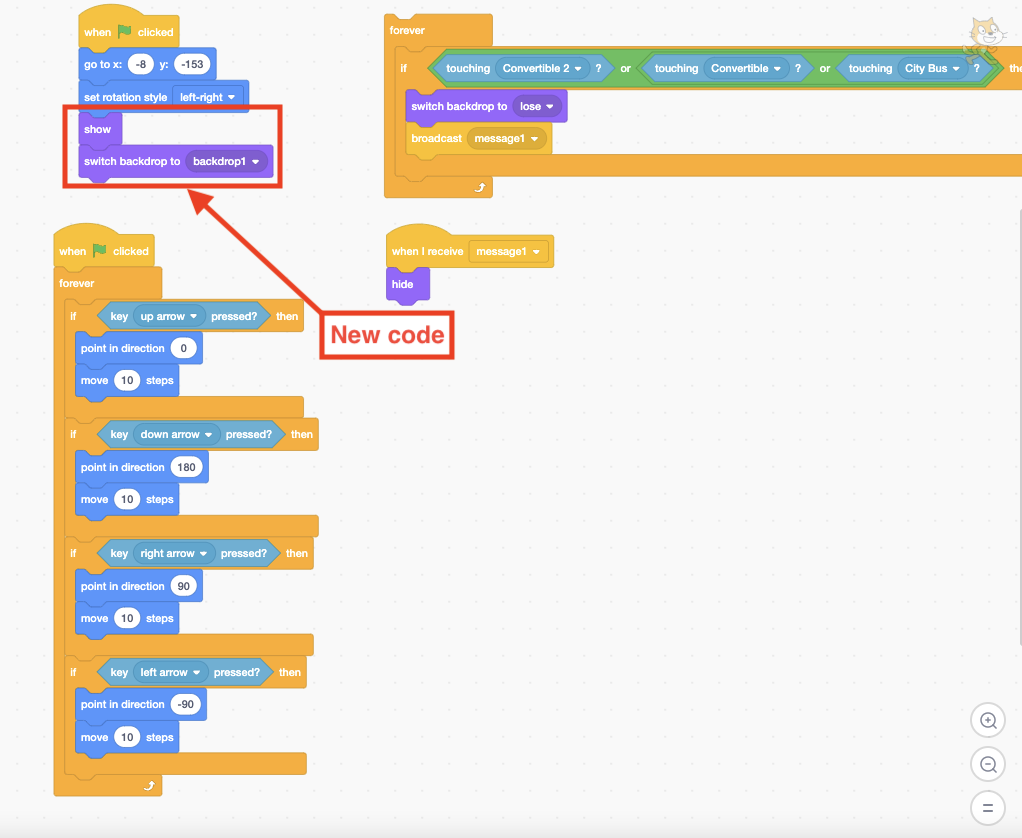
For the game logic section, grab another when green flag clicked block and another forever block. (You can also put all of the following code right after the previous code, if you feel confident.)
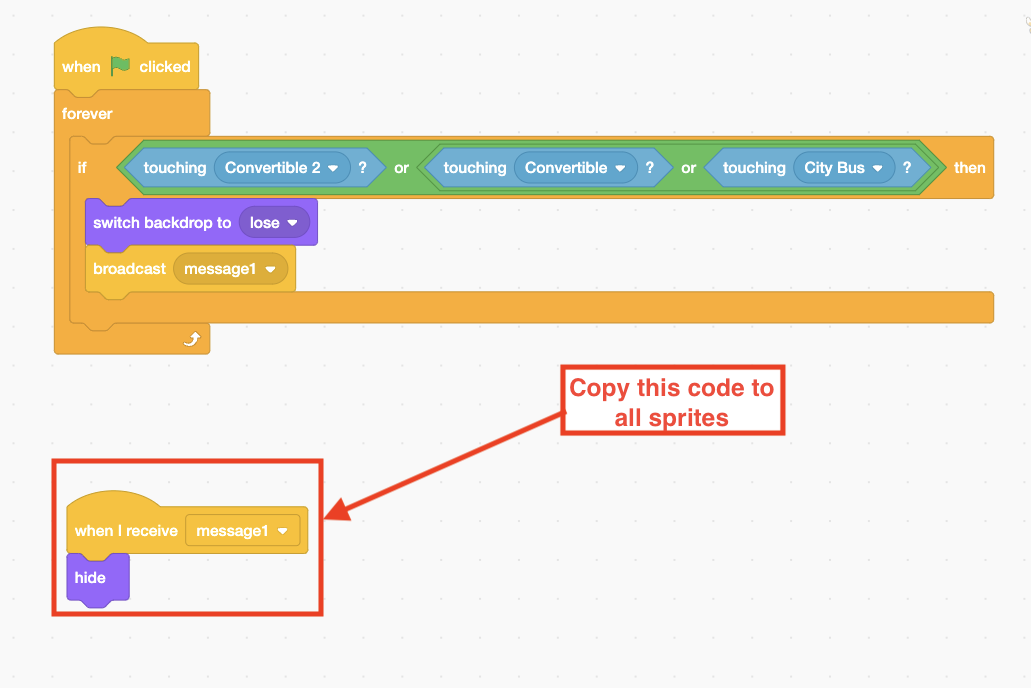
Grab an if block and fill its diamond shape with an or block from the operators section. Depending on how many cars you have, you might need more or blocks. You want as many bubbles as cars.
Fill each bubble in the green or blocks with a touching block- one for one car, one for another car, etc.
Inside the if block, grab a switch backdrop button from the costumes section and a broadcast message block from the events section.
Make a new header block- when I receive message (from the events section).
Underneath the new header block, snap a hide block from the looks section. Repeat this code for all sprites- when they receive the message, hide!
Cleanup and final code
When you next run your code, you might be surprised! Your sprites will be hiding and your background will be wrong. We have to tell the sprites to show when we click the green flag, and for the background to start with our starting background!
Underneath the green flag clicked block in our sprite code that has our go to… and set rotation style blocks, add a show block from the looks section of the toolbox. Then, add a switch backdrop to block and set it to the starting background.
In every other sprite, add a when green flag clicked block and a show block.
Congratulations! You have a full game.
